
Monday, December 04, 2006
Making Do on Mondays: christmas projects
Beeswax Ornaments: Nothing smells better or is as aesthetically pleasing as plain old beeswax! There are many lovely molds out there you can use to make these ornaments. Click here for a site where you can see how they are made and to purchase materials.
Magnets (gift idea):

Beeswax Candle Making: See this post for this project. There are also sites out there that sell beeswax for dipping pillar candles.
Painted or colored tin christmas ornaments: You can buy sheet metals (tin or copper) that are thin enough to cut into different shapes. Make stencils out of cardstock or cardboard and hand them out. After the shapes are cut, make a hole where the string will go through and then use wooden blunted tools to imprint your own designs. -A dull soft-grade pencil works well also. Then you can put colored lines in the imprinted lines using your favorite fine-tipped markers. -If you're using copper sheets, I'd just leave them plain after imprinting a design on the surface. The color of copper is perfect the way it is. Click here for a site that sells copper sheets.
~Sia, in Vancouver, WA
Labels: crafty posts, Seasonal
 one of us ::
12:01 AM ::
0
Comments
one of us ::
12:01 AM ::
0
Comments
Tuesday, November 21, 2006
Autumn Leaves
I just recently went on a very refreshing hike. It rained here for a week straight and then, finally, there was a break. There were actually patches in the sky; everything was damp and dripping wet, but there were still brilliant leaves on many of the trees. Aidan (my son) and I set out on our little local trail (almost literally in our backyard!). We passed the lake, walked through the deep forests full of oaks, maples , birch, firs and pines. We followed the river further down and found ourselves crossing a bridge deep down in the gorge. The water is very high right now from all the rainfall, so the river water thundered through the trees along it's limestone rocky course. As I hiked back up the hill, through the upper meadows full of gnarly mossy oaks, I smelled woodsmoke in the air... probably from a nearby house I couldn't see. That smell is so strong and wonderful; it reminded me of my family's land back in Ohio. -This time of year they always have the woodstove going. You can smell it all over the many acres they own.
It is such a joy to go on these local trails with Aidan. He's my little companion in everything I do and will be for many years. He already delights in the sights and sounds, I can tell, because he marvels at everything, in his own way, already. As he grows older we may have to walk slower and won't be able to cover as much ground, but it will be fun to pick up leaves together and teach him about the different kinds of trees, mosses and such. The leaves here are giant! Some of the maple leaves are literally a full square foot. I picked up a lot of them to press back here at the house and was reminded of all the things one can do with the radiant leaves of autumn:
~Press them and then laminate them betwen two sheets of plastic, then turning them into magnets for the fridge (glue a magnet on the back side of the laminated plastic peices) or into placemats, depending on the size or quantity of them.
~Press, then make tiny holes (using a hole puncher) in the tops of the leaves. Tie strings to each leaf and hang them at different heights from the upper window jam. This also could make a wonderful decoration for Thanksgiving. Of course, be sure that the leaves are strung on the window high enough so that little hands can't tear them down. The leaves are fragile in this state!
~Place a leaf on the flat tabletop, put a peice of paper over it and, holding in place, color over the paper with a sideways-crayon or a block crayon, so that the veins and sides of the leaf (the relief parts) show through onto the paper.
~After pressing, place on beautiful folded handmade, natural paper and cover with transparent laminating plastic to make a leaf card for stationary.
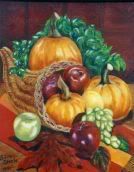
~Whether you have colorful golds, reds and oranges or plain old yellows and browns, leaves are still fun to adorn your Thanksgiving table. -Gourds and tiny pumpkins are also lovely.
~Sia writes from VERY rainy Vancouver, WA
Labels: crafty posts
one of us ::
12:00 AM ::
3
Comments
Monday, November 20, 2006
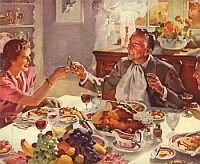
Making Do on Mondays: ThanksgivingThanksgiving is right around the corner. Here is a compilation of great articles or tips related to this day:
 First let's talk decorations:
 "Decorate from nature. Instead of buying those honeycomb paper turkey decorations and cartoonish pictures for the wall, scatter (clean) leaves over the tablecloth. Place an arrangement of twigs in a flower vase; it will look better than it sounds, especially if there are some berries on the branches. A bowl of fruit can serve as both a course for the meal and your table's centerpiece. Candles, table runners, and harvest-themed objets d'art are easily found at second-hand shops and garage sales, if not in your own attic."
This webpage has some GREAT tips on how to get kids involved in the day: "Thanksgiving can be either an awful or wonderful memory for kids. It can be a day full of adults yelling to "get away from that stove" and "don't stand in front of the tv while the football game is on" or it can be a day where kids help prepare food decorate the table, greet the guests, and have a good time." This site has a whole slew of Thanksgiving craft ideas for kids.
 Come Thanksgiving morning, you may realize that there is a lot more kitchen traffic than you bargained for. Start your meal preparations now! You can make a big batch of Cranberry Sauce and freeze it. Plus your dressing always tastes better the next day so why not prepare it a day early? You can also get away with cooking several of your baked items at the same time. Even a little temperature difference won't mean much if you keep an eye on your casseroles and pies.
And do you have one or more guests coming over that are vegetarians? I liked this article that gives good tips on how to entertain and prepare for such a person in a meat-eater's domain!
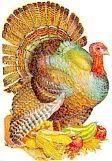 Here are some good Turkey Leftover ideas.
Even more...
Happy Thanksgiving!
-Ellie: Oak Harbor, WA
Labels: crafty posts, Seasonal
one of us ::
8:47 AM ::
1
Comments
Thursday, November 02, 2006
Beeswax Candle Making Beeswax is one of the most wonderful smelling natural substances I know. It is pure and delightful and, for me, is a smell I associate with certain churches and with Christmas time growing up. We used to make beeswax candles for gifts. They are relatively easy to make, don't take too much time, and are a really fun hands-on project for older children. Another advantage of making your own candles is that it is a wonderful economic choice for gift-giving times such as the Christmas season. For $20 you can make about 12 straight-sided candles. (Or 24 tapered candles.) If you buy some rafia, you can bundle up 2 candles, tie them with rafia and you have 6 lovely homemade gifts.
Magic Cabin sells a very affordable candle making kit. There are plenty more web sites and stores out there who sell the sheet beeswax and wicking, but this is the one that I know of and have used. They seem to have the best colors. They come in pastels or brights, but all colors are really good tones.
~Sia, in Vancouver WA
Labels: crafty posts, Reflections
one of us ::
8:26 AM ::
3
Comments
Thursday, October 26, 2006
The Hope Chest "...A Hope Chest was originally used as a dowry. It was property that a woman owned and brought into her marriage. Some women could not find a suitable husband, for various factors; therefore, the dowry was used as a way of enticing a man into marriage...
The idea of a Hope Chest symbolizes so many hopes and dreams... building a family legacy—a heritage.
A Hope Chest is really nothing more than a wooden chest, a closet, a storage unit, or a large box full of items that have been collected over time. But inside that object, is something much more special—it's a place where one places all her treasures and dreams, as she waits for life to unfold..." ~Alyice Edrich, from the parent site.
I love the idea of a hope chest. Although in our time we ladies do not need dowries, many of us love the idea of collecting things for our own house someday: things which someday we will be able to use in our own kitchens, our own dining rooms... our own beautiful little things to hang on the walls or drape over a chair. We like to collect things from our travels, thinking to ourselves "some day I'll put this in my own bathroom, " or "someday I'll use this basket for my baby socks"... It is a joy to collect all these miscellaneous items for the future.
I never really had a "home" between the time I was living with my family and then married. I was always living in rough conditions, i.e. camping, living in cabins, or sharing an apartment with someone for a few months. But when I got married and my husband and I had our own apartment, it was monumental for me to be able to FINALLY, unpack the old stuff I'd been collecting in old cardboard boxes. I filled my home with treasures... I may not have been collecting furniture, but I had many other, more important treasures, which were such a joy to finally use and see day-to-day. One thing I always wished I'd had over all those years, though, was a beautiful wooden chest of my own to hold these many items.
Traditionally, though, a hope chest was used by the MOTHER to collect things over the years for her daughter, preparing her for marriage. She would place the neccesities into the chest: table linens, bed linens, candleholders, etc. I think that this is equally special!
Now, as I start of my life as a mother of God-knows-how-many children, I am faced with the question: Do I provide my children with a hope chest which I give to them at a younger age, or do I surprise them with their own which I assemble for them over the years, giving it to them when they're 18?
I've decided to do both, sort of. I took so much joy in collecting all my own treasures over the years that I want to, and will, encourage my children to do the same. But My husband and I have many fun ideas for making up our own chest for each child. My husband is going to make a chest for each one, and over the years we hope to fill the chests with items which we want them to be able to cherish later: such as a few useful kitchen items or tools, keepsake items such as their first drawings, their first paintings, their first stories...I also hope to occasionally do a tracing or handprinting of their hands in clay and fire it for them. That could go in there, too. There are also little peices of HOME which we hope to include, but we don't know what this will be yet.
All this being said, I will sign off for now. These are just some little thoughts on this dear tradition.
~Sia, Vancouver, WA
Labels: crafty posts, Reflections
one of us ::
5:27 PM ::
0
Comments
Tuesday, October 17, 2006
Making Your Own Wall Cards Alphabet and counting wall cards are a common decoration we often see in each others' homes. They are colorful and fun to have up, and are helpful to have around for children to see as they learn their numbers and letters. For those of you who enjoy doing art projects with your children, this may be a fun project to start working on, using simple card stock as the base. You could have them do a wall card every day until you have a whole set of numbers or letters, with a corresponding picture of a subject with a title or quantity. Magic Cabin sells these and theirs are very colorful and inspiring. I may start working on making some for our home, or simply wait until Aidan can draw/color. There was one family I knew back in Ohio who had made a whole alphabet banner for their homeschooling room. Their oldest daughter (age 7 at the time) illustrated each letter with certain objects such as fruits, flowers, animals, etc. and the younger children helped to make the actual letters, which they colored in with crayons.
~Just a fleeting, fun thought! You are all going to get around to these fun art projects before I do if I keep sharing my ideas and muses ...!
~Sia, Vancouver, WA
Labels: crafty posts
one of us ::
6:35 AM ::
0
Comments
Monday, October 09, 2006
Making Do on Mondays: Using Different Mediums for Art Projects Sometimes it's fun to do more with art projects than using the conventional colored pencils, markers, crayons and paints. These are some more adventerous ideas which children love and become really motivated by. I've done most of these projects with children and they don't ever want to stop.
 ~Start off with a regular peice of cardstock and then have the child (or you, depending on their age) draw a person... a figure of some sort, ie princess, cowboy, fireman, farmer, etc. It should fill the page, so that you will have room to decorate the different parts of this figure.
~Rather than them just coloring it in, have them do that in addition to adding texture with other materials:
~Yarn for hair.
~peices of construction paper, foil, and colorful/patterned material for the clothing and parts of body.
~ Pasta, glitter, wood chips and anything else you can think of for the backgrounds or the floor.
Rather than a character your child may decide to do an animal, in which case you could use all types of mediums for the habitat around the animal, such as green yarn or felt stuffing for a tree, blue construction paper for water, real wood bark for a tree, and so on.
Elmers glue works well but there are many types of good all-purpose glues which you can find in art supplies stores which are more efficient for all these mediums.
Elisa Kleven, a collage artist and author of children's books, has been the most inspiring artist to me for these types of projects. You may want to try to find a few of her books in your local library and look at it for ideas. Some of our favorites include: The Lion and the Little Red Bird, The Paper Princess, and B is for Bethlehem. She has some pictures which will give you a lot of great ideas.

~Sia, Vancouver, WA
Labels: crafty posts
one of us ::
10:01 AM ::
1
Comments
Thursday, October 05, 2006
Straight from the Farm I found this great little webpage that details a lot of the homemade toys this man made as a child as well as the instructions on how to make them yourself. Take what you will... no comments on the shooting toys necessary. I've found if you don't allow your kids to play with guns they'll use sticks or legos or whatever else instead. So mine have taught me anyway, despite my best efforts to steer clear of gun toys. I've concluded it's best to just teach them about respect for guns and the proper use for them instead. (Still don't buy or encourage gun toys though... swords fine... but guns... just not my thing).
Anyway, I loved looking through this page and hope you find some treats in there as well!
-Ellie: Oak Harbor, WA
Labels: crafty posts, useful ideas
one of us ::
9:32 AM ::
1
Comments
Friday, September 08, 2006
Friday Coffeehouse: Filters 101 Here are some tips about coffee filters. I don't think it's any secret now that I'm a big fan of Heloise, so I must give credit to her where many of these ideas came from! Others were just collected here and there from the web.
First think outside the coffeemaker and use filters for the following:
- Cover a bowl or dish in the microwave
- Clean windows and mirrors without any streaks!
- Place filters between nice serving dishes or plates in order to prevent scratches and chips. This is also a good idea when you stack non-stick cookware
- When serving tacos to children, put the taco in the filter before handing it to the child for less mess. This works well for sandwiches and burgers too... especially if your children eat on the go.
- Use as a potpouri sachet by tying it with string or use tape. (So the ends stick up like an onion. Or fill with baking soda, tape it closed and toss it in your laundry (or diaper) bin to help keep it odor free. Just replace the sachet every few weeks or as needed.
- You can use a coffee filter to diffuse the flash of your camera when taking pictures.
- Coffee filters can help protect your cast iron skillet if you place one in there to prevent rust!
- Strain wine from a bottle with a broken cork.
- Use as any kind of disposable bowl. They are great sizes for kid-servings of popcorn/crackers etc.
- Filters are light so they make good little containers when you need to weigh household foods.
- Use as a makeshift tea-bag if you use loose leaves. Simply tie with a string.
- If you don't want the soil to crumble out of your small house plants, just place a filter at the bottom before repotting!
- Slide filters over a popsicle stick to help keep stickiness in check!
- You can use filters when mixing dry baking ingredients or cinnamon/sugar to cut down on your dish load and save other bowls being used.
- Drain bacon or frying grease through a filter to remove food particles if you want to save the grease.
- If you have a potty chair cup, you can line it with a filter for easy clean-up.
Do you ever buy the special one-cup cone filters? You can save money by purchasing the regular filters: simply fold it in half twice and open one side... you have a cone!
If you want to simplify your coffee-making process you can make your own filter packs instead of buying them. Place your filter in a large margarine tub or tupperware, measure out your coffee, add another filter and continue the "layers" until the container is full. Seal tightly and enjoy fresh, easy coffee each whenever you need it! This is especially helpful if you grind your own beans but dislike that noise in the morning...
If you have problems separating filters, just turn each layer inside out!
There you have it, congratulations on graduating from Coffee Filtering 101!
Ellie: Oak Harbor, WA
Labels: crafty posts
one of us ::
7:42 AM ::
1
Comments
Thursday, September 07, 2006
A Scrapbooking Alternative If you are anything like me, you have the best of intentions with scrapbooking... but no follow-through. With my first son, I started to fill one in, kept track of important milestones and photos and all that. But I knew deep inside it wouldn't last. I figured that with each child I would lose motivation/time/energy to scrapbook and it just wouldn't happen. Then I felt bad thinking I'd have a book of memories with one son but nothing for the rest of present (and God-willing future) children. So I came up with a new plan.
I write in journals for my boys. I started with Xavier before I even knew his sex in the womb... just writing about my feelings toward him, etc. I've continued this with Leo and just wrote my first entry to the new babe last night. I don't have a set time frame of when I'm "supposed" to write... anything reeking of organization or commitment must keep far from me! I simply write when I feel like it, about what the child is learning or our current life events, always how much I love them and pray for them... This usually ends up being every few months or so. I've put little photos in their journals every now and again, but they're not attached, just hanging out loosely. I included a letter my husband wrote to our son when he was deployed. But mostly it's just words on a page.
I plan on giving the kids their journals sometime around their 18th birthday or so... I would have LOVED to have my own little book of my mother's thoughts toward me as I was growing up. I think it'll be something they can really treasure some day. And best of all, it requires minimal organization and time from a busy mom like me!
Ellie: Oak Harbor, WA
Labels: crafty posts
one of us ::
12:46 PM ::
1
Comments
Monday, July 31, 2006
Making Do on Mondays: Artsy Alternatives Most of these are old tricks, but they don't always see a lot of press and I think they are wonderful little activities to encourage artistic tendencies in your child... and on a budget too!
- Rainbow Crayons
You know the culprits- those broken up chunks of crayons that no kid likes to reach for anymore. Well, gather them up, peel the wrapper off them and put a few different colors in a glass measuring cup and bake on 350 for a few minutes. Then you can pour the melted colors into plastic cookie cutters or candy molds and let them cool for a few hours. Kids suddenly have fun new big, chunk crayons to play with! I've found that if you let them melt too long, the colors kind of run together so you have to watch it. Or you can put like colors in different containers to bake and then customize your swirls and rainbow effects in the mold. Muffin tins with paper liners also work if you just want big, chunky crayons useful for shading.
- Edible Playdough
Making playdough is simple enough, but here are a couple fun recipes to use where you don't have to worry about your little ones swallowing chunks of it:
-2 parts oatmeal
-1 part water
1 1/2 parts flour
Knead until soft. Food coloring can be added to the water before mixing it in.
I also liked this following recipe I found because it sounds like it actually tastes good! Though I'm not sure colors would work in it.
8 oz. creamy peanut butter
3 TBS. honey
1 cup dried, powder milk
Add powdered milk until mixture becomes dough-like.
- Sidewalk Paint
Now this should be perfect for those warm summer days:
-1/4 cup water
-1/4 cup cornstarch
-6 to 8 drops food coloring
Just mix it all together and there you have a great base for painting in driveways or on sidewalks... it washes of easily with water.
-Ellie: Oak Harbor, WA
Labels: crafty posts
one of us ::
10:02 AM ::
2
Comments


